

In today's real estate market, standing out takes more than listing photos or a written description. Buyers and investors increasingly expect to explore a property remotely before deciding whether to see it in person. A well-made video walkthrough is one of the most effective ways to deliver that — whether you're an agent, developer, or property owner. This guide covers the full process: planning, equipment, shooting, editing, and promotion.
Why Video Walkthroughs Matter for Real Estate
Remote access. A video walkthrough lets buyers explore a property from anywhere, which is especially valuable for out-of-town or international buyers who can't easily attend an in-person showing.
Pre-construction appeal. For developments still under construction, a walkthrough (often built from 3D renderings) is frequently the only way to give a buyer a real sense of the finished product.
Time efficiency. A good video can reduce the number of low-intent in-person showings by letting buyers self-select before booking a visit.
SEO and engagement. Video content tends to increase time spent on a listing page, which is generally a positive signal for both user engagement and search visibility.
Trust and transparency. A polished, honest walkthrough shows buyers exactly what they're getting, which builds credibility versus photos alone.
Step 1: Plan Your Walkthrough
A good walkthrough starts with a clear plan, not a camera.
Set clear goals. Are you showcasing a family home, a luxury condo, or a commercial space? The purpose shapes everything downstream.
Know your audience. Families may want to see the backyard and nearby schools; investors may care more about layout efficiency and rental potential.
List key features. Identify the must-show elements — open-plan kitchen, smart home tech, proximity to transit or amenities.
Build a storyline. Plan a logical flow: exterior establishing shot, main living areas, standout features, and a memorable closing shot.
Create a shot list. Detail every scene in advance — "drone shot of facade," "wide shot of master bedroom," "close-up of countertops" — so nothing gets missed on shoot day.
Budget realistically. Cost varies enormously by approach, from a basic DIY video to a fully custom 3D-animated walkthrough — see the cost breakdown further down.
Practical tip: a free tool like Trello or a simple shared document works fine for storyboarding — you don't need specialized software to plan effectively.
Step 2: Choose Your Equipment
You don't need a large budget for solid results, but the right gear matters:
Camera: A DSLR/mirrorless camera or a modern 4K smartphone both work well for most projects.
Stabilizer: A gimbal or tripod prevents shaky footage, especially for walking shots through a space.
Wide-angle lens: A true wide-angle lens (roughly 10–24mm) captures spacious rooms without distortion — avoid fisheye lenses, which visibly warp perspective and can misrepresent room proportions.
Lighting: Natural light is ideal; portable LED panels help brighten dim interiors when needed.
Microphone: An external mic captures cleaner audio than a built-in camera or phone mic, useful for narration or ambient sound.
Drone (optional): Adds cinematic aerial context, particularly effective for larger properties or showcasing a neighborhood.
Budget tip: a basic clip-on wide-angle lens and a simple tripod paired with a good smartphone can produce solid DIY results for smaller projects.
Step 3: Stage the Property
Poor staging can undercut even a well-shot walkthrough.
Clean and declutter — remove personal items and clutter to create a neutral, welcoming space.
Stage thoughtfully — minimal, tasteful decor (fresh flowers, simple throw pillows) adds warmth without visual noise.
Optimize lighting — open curtains and turn on all lights for a bright, even look; avoid harsh shadows.
Highlight selling points — arrange furniture to draw attention to real features (built-ins, closets, a home office nook).
Attend to curb appeal — a tidy lawn and entrance matter for the opening exterior shots.
Step 4: Shoot with Precision
Start with the exterior — a wide establishing shot or drone view sets the scene.
Follow a logical path — move through the space the way a buyer naturally would, entrance to living areas to bedrooms to outdoor space.
Keep shots steady — a gimbal and a slow, deliberate walking pace prevent jerky footage.
Capture detail shots — close-ups of distinctive features (cabinetry, fixtures, finishes) add texture to the edit.
Show context — brief shots of the neighborhood, nearby parks, or a skyline view help convey lifestyle, not just square footage.
Shoot multiple takes — 2-3 passes of each scene from different angles gives you real flexibility in editing.
Timing tip: golden hour (early morning or late afternoon) generally gives the most flattering natural light; harsh midday sun can create difficult shadows for interior shots.
Step 5: Edit for a Polished Result
Common editing tools include Adobe Premiere Pro, Final Cut Pro, or the free DaVinci Resolve.
Trim and sequence — cut shaky or redundant footage, arrange scenes in your planned order.
Add clean transitions — simple fades or dissolves between rooms; avoid flashy effects that distract from the property itself.
Use text overlays sparingly — simple labels ("Primary Suite," "Updated Kitchen") in a clean font can help orient viewers.
Add music carefully — a royalty-free track suited to the property type (upbeat for a modern condo, calmer for a family home).
Consider a voiceover — a brief, natural narration can add warmth, but isn't required for an effective walkthrough.
Color grade thoughtfully — small adjustments to brightness and warmth can make rooms feel more inviting without looking artificial.
Keep it appropriately short — most walkthroughs work well in the 2-5 minute range; luxury or commercial properties can reasonably run longer if the content justifies it.
Step 6: Optimize for Search and Visibility
Use a clear, descriptive video title that names the property type and location.
Write a genuine, specific meta description rather than a generic one.
Tag relevant, accurate keywords related to the property and walkthrough format.
Design a clear thumbnail that represents the actual content, not a misleading image.
Publish across relevant platforms — YouTube, Vimeo, your own site, and listing platforms like Zillow or Realtor.com where applicable.
Add captions for accessibility, and as a secondary benefit for search indexing.
Step 7: Promote the Walkthrough
Social media — short clips work well on Instagram and TikTok, full walkthroughs suit LinkedIn for B2B/commercial audiences.
Email — share with your existing subscriber or client list with a clear call to action.
Embed everywhere relevant — your site, listing pages, and the blog post itself if applicable.
Paid promotion — targeted ads can extend reach to a specific buyer demographic or location if budget allows.
Listing platforms — upload directly to Zillow, Realtor.com, or LoopNet depending on property type.
Step 8: Track Performance and Improve
Use YouTube Analytics, Google Analytics, or platform-native insights to monitor views, watch time, and click-through rate. If viewers consistently drop off early, the video may be too long or front-loaded with the wrong content. If a particular type of shot (aerial, detail close-ups) consistently performs well, prioritize more of it in future walkthroughs. Real, ongoing performance data from your own properties is far more useful here than any general industry benchmark.
Advanced Techniques Worth Considering
3D animation — for pre-construction projects especially, a photorealistic 3D-animated walkthrough can convey a finished space that doesn't physically exist yet.
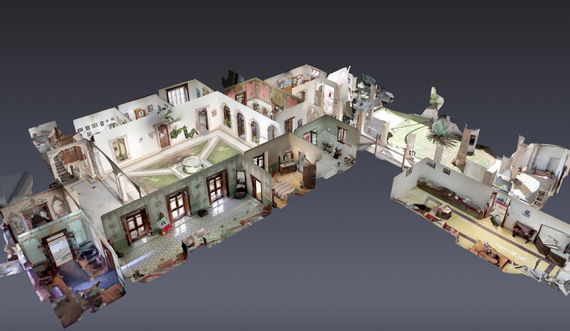
Interactive hotspots — tools like Matterport allow clickable elements so viewers can explore specific room details or view floor plans.
Augmented reality — furniture-visualization AR apps let buyers preview how a space might look furnished.
Day-to-night comparisons — showing a property in different lighting conditions can appeal to different buyer priorities.
What Does a Real Estate Walkthrough Video Cost?
Approach | Typical Range |
|---|---|
DIY (smartphone, basic gear, free editing software) | $100 – $500 |
Freelancer (live footage, simple edit) | $500 – $2,000 |
Professional studio (drone, advanced editing, custom features) | $2,000 – $6,000 |
Full 3D-animated walkthrough | $4,000 – $15,000+, project-dependent |
General 2026 industry ranges — confirm current rates directly with any studio, including us.
Why Work With a Studio Instead of DIY
Creating a genuinely polished video walkthrough takes real time, equipment, and editing skill. A professional studio can offer photorealistic 3D rendering capability (useful especially for pre-construction properties), tailored solutions for different property types, and faster turnaround than most DIY timelines allow. [Add real, verifiable details here — actual client examples with permission, actual typical turnaround — rather than the previous unverified figures.]
FAQs
What's the ideal length for a real estate walkthrough video? Generally 2-5 minutes for most residential properties; luxury or commercial spaces can reasonably extend to 5-10 minutes if the content supports it.
How much does a real estate walkthrough video cost? DIY runs roughly $100-$500, freelancers typically $500-$2,000, and professional studios (including full 3D animation) from $2,000 up to $15,000+ depending on scope — see the cost table above.
What's the difference between a video walkthrough and a 3D virtual tour? A video walkthrough typically uses live footage, sometimes with light editing enhancements. A 3D virtual tour more often involves full 3D rendering or interactive 360-degree navigation, and is especially useful for pre-construction properties.
Are there DIY apps for creating real estate walkthroughs? Yes — tools like Matterport, iStaging, and similar platforms offer self-service options for straightforward projects.
Getting Started
Ready to create a professional video walkthrough for your property? [Get a Quote →]
Book a discovery 20-minutes strategy call.
📞 +91-9910911696 | +91-9910660851
📩 info [@] chasingillusions [.] in
Written by Deepak, Architectural Walkthrough content strategist at Chasing Illusions Studio. Our clients include DLF, Emaar, Ganga Reality, Banner Boswell, Shapoorji Pallonji, EC World, Taj, Florida Hospital, etc., 100+ architectural companies across India, USA, Thailand, and the UK.
Chasing Illusions Studio
Premium animation & video production studio based in Delhi, India. Specialising in 3D animation, medical visualisation, architectural walkthroughs, and CGI.